
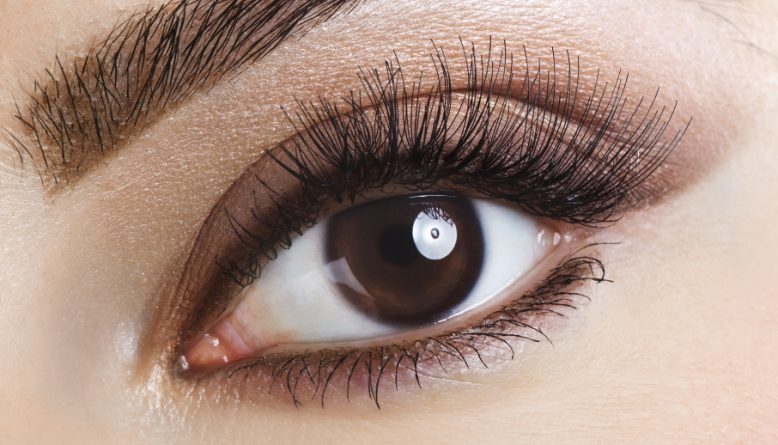
Is tinting lashes at home impossible? Not at all! I’ve been doing it for years. To me, visiting beauty salons for such nothing-hard treatments is too much. Unless you have too much money to spend. I think doing eyelash extensions in a salon makes more sense – you need a specialist’s help and precision.
Today, I will tell you – step by step – how I apply tint to my lashes at home. It’s very easy and – believe me – everyone is able to define the colour of eyelashes by themselves.
Eyelash tinting home treatment – you need:
- tint cream (matching shade),
- a glass and an applicator (brush),
- cotton pads,
- some vaseline,
- a bowl of warm water,
- hydrogen peroxide.
If you’ve prepared everything, get to action. 30 minutes are enough to do eyelash tinting at home but mind I have more experience. If this is your first time, reserve at least one hour.
Eyelash Tinting – Step by Step
- Prepare a bowl of warm water (not too hot!). Cut two pads into halves. Add the cream in proportions indicated on the packaging. Usually, it’s 1.5 cm of cream and 4-6 drops of hydrogen peroxide. Mix until you get a smooth creamy mass.
- Take two halves of the pads and apply vaseline to straight ridges. Press the pads under lower lashes. In this way, the skin is protected and the treatment is easier.
- Take a brush and spread the cream onto eyelashes on the pad. Obviously, you must keep your eye closed. I always do my best to spread the tint even at the roots of lashes yet I’m careful not to smudge the lower and upper eyelid. The eyelashes must be ideally covered with a lot of cream(as if glued to the pad).
- Put two other pads on the cream-covered lashes. Wait at least 10 minutes. Next, take the pads off; I usually gently press them between fingers to gather the excess of the tint. Then, I wipe the lashes with clean pads soaked in water.
Easy, isn’t it? 🙂

Leave a Reply