DIY Lash Extensions caught my attention completely by accident. I was browsing beauty news and came across the Nanolash website. Eyelash extensions yourself at home sound exceptionally good, so I decided to check them out. What are my findings?
DIY Lash Extensions – what did I choose and what were my first impressions?
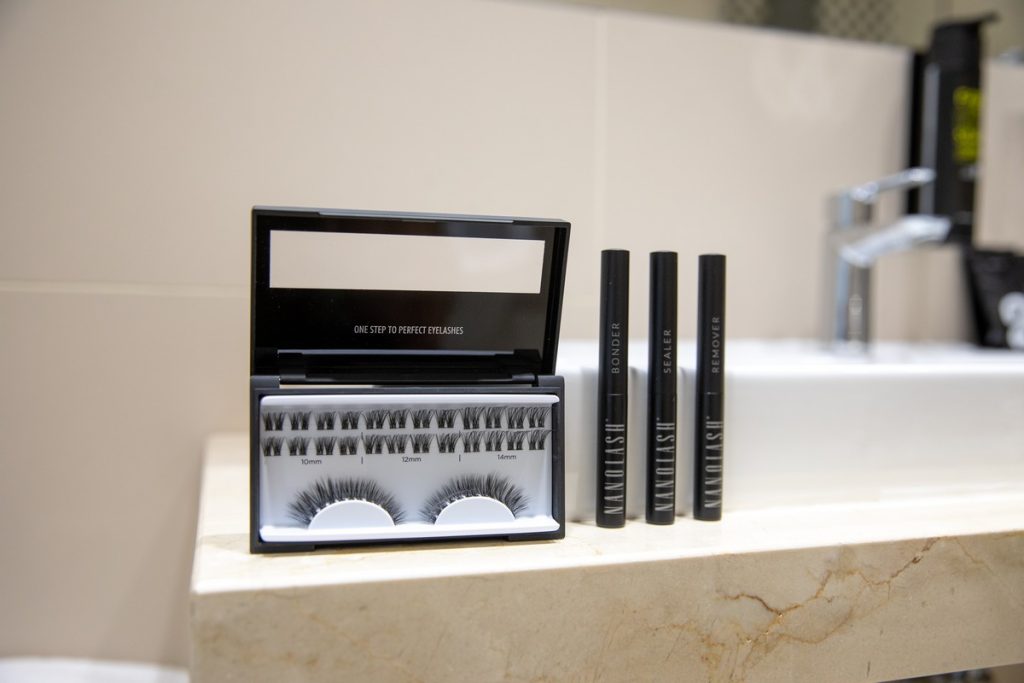
I bought a box of DIY Lash Extensions. In the case, I found 36 cluster lashes in 3 lengths: 10, 12, and 14 mm. There were 8 different styles to choose from. However, on the manufacturer’s website, there is also an interesting complete kit for eyelash extensions at home.
The DIY EYELASH EXTENSIONS STARTER KIT includes:
- Nanolash bonder;
- Nanolash sealer;
- cluster lashes for DIY application;
- Nanolash remover;
- stainless steel eyelash tweezers.
I chose the lash clusters on their own, as I already had the other accessories in my makeup bag.

First contact with DIY Lash Extensions from Nanolash
After taking the Nanolash cluster lashes out of the package, I was positively surprised. They are made of ultra-soft material and are extremely flexible.
The individual lashes cling very well to the thin strip which can precisely conceal the connecting points, which is super important to me.
These cluster lashes for at-home application were nicely arranged in the case. I had no problem taking them out or recognizing the length.
How do apply DIY lash extensions using Nanolash cluster lashes?
The manufacturer claims eyelash extensions with lash clusters for DIY application can be completed in only 10 minutes. I decided to see if this was really the case.
Let me just add that I have never tried at-home eyelash extensions before. I also rarely used strip lashes too. I usually used mascaras or had my semi-permanent extensions done by my beautician.
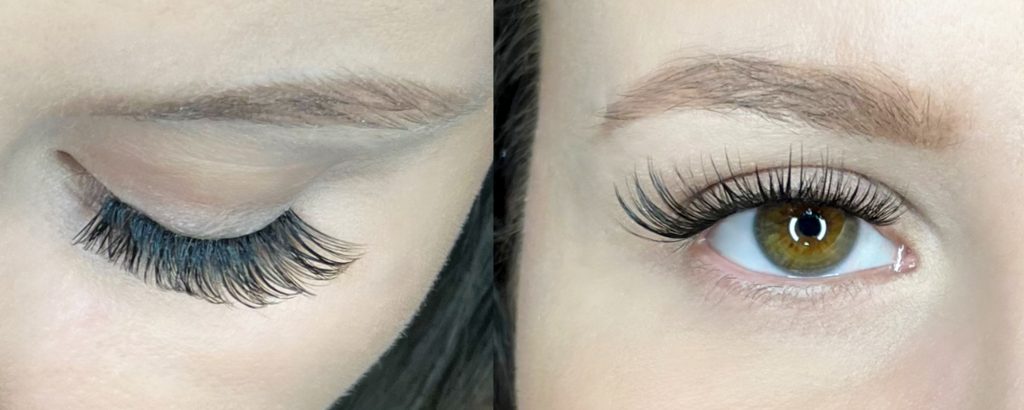
I started by removing my makeup properly. I removed all makeup residues from my eyelashes and then gently dried them. Then I applied one coat of bonder on the entire lashes. I waited until it became fully tacky. I grabbed the cluster and applied it underneath my natural lashes, about 1 mm away from the lash line. I repeated the same process with my other eye. I used 4 clusters per application, as I wanted to achieve a soft effect.
Of course, you can use more clusters, aiming for a Russian Volume effect.
The application was extremely easy and actually took less than 10 minutes. At this point, I can confirm the manufacturer’s claims.

DIY Eyelash Extensions allow you to make your lashes lusciously long at home.
Cluster lashes – how long do they last?
The manufacturer declares that the effects of DIY Lash Extensions hold up to 5 days. For at-home lash extensions, this is a pretty good result. However, I decided to see if they could be worn a little longer.
I applied the lash clusters on Monday. The following Monday they were still in place. I tried to sleep on my back and avoid oil-based cosmetics. I know from experience that they can spoil the properties of the glue. In my opinion, because of my lash care routine, I was able to extend the longevity of the application.
I took my cluster lashes off to see if I could use them again. The Nanolash brand indicates that they are designed for single use. However, after taking them off, I noticed that:
- the glue can be easily removed from the strip;
- the clusters did not deform;
- the false lash clusters continue to look great.
I applied them once more and I was not disappointed. In my opinion, DIY Lash Extensions can be used more than once.
DIY Eyelash Extensions – I’m all in!
The DIY Lash Extensions are my No.1 product when it comes to do-it-yourself lash extensions at home. The application is easy and actually only takes 10 minutes. Plus, the ready-made cluster lashes are long-lasting and reusable.
If it actually takes so little to achieve satisfactory results, then DIY Lash Extensions are the perfect product!


Leave a Reply